Gallery of Samples
Watch and Share. Other peoples result and different models.


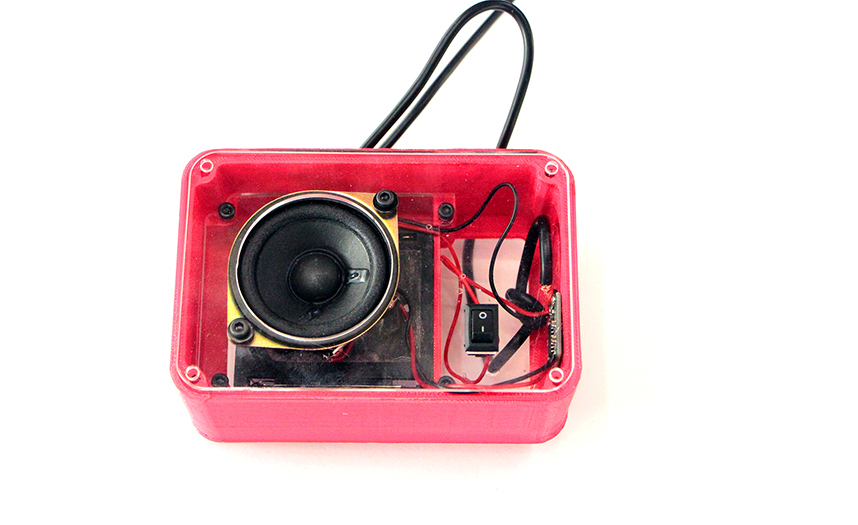
Bits and Atoms Speaker

Laser Cutter, 3d printing,all in an open source design.
Glo-bal shared knowledge and lo-cal production.The third industrial revolution is here.
The concept of the Fab Guetto Blaster is to lets you make all the parts so you can replace, customize,pimp... based on your needs. The lightweight and portable package make it stronger. Using a very efficient class D amplifier allows this magic box to last at least 60 hours of NON STOP
Dedication to Detail . All parts are designed with a dedication to detail,because easy assembly kits can also look AWESOME!
Mobility. In case of the bluetooth version up to two friend can be connected,so everybody can share their taste!
Watch and Share. Other peoples result and different models.
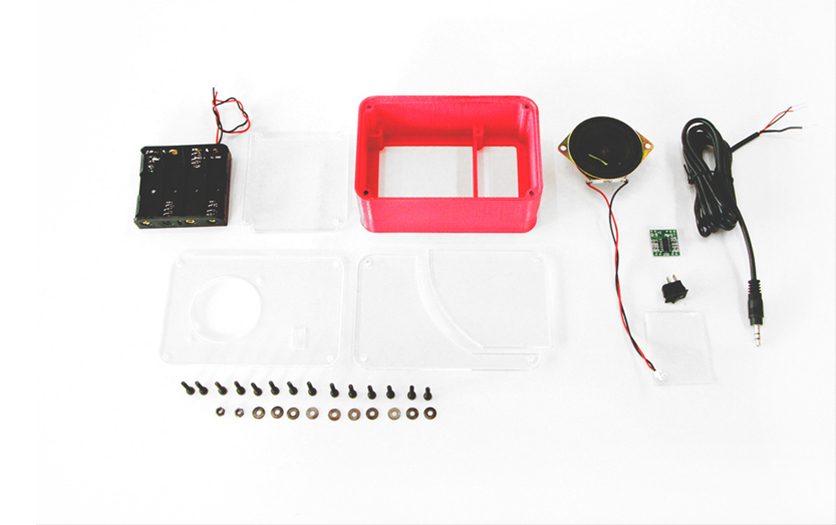
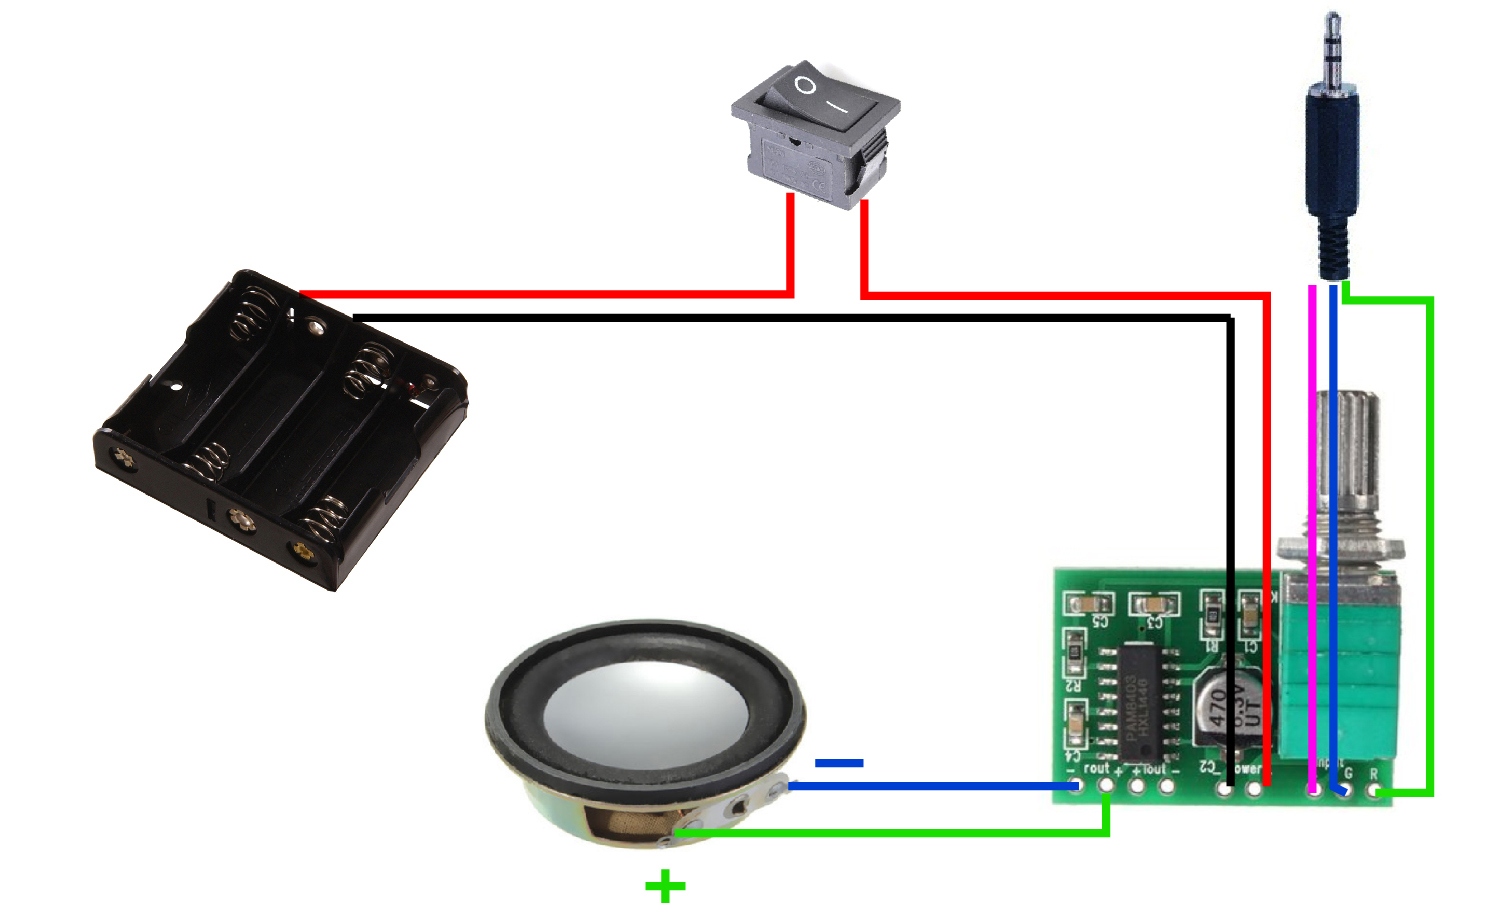
Get all the components. Here is the B.O.M for multiple configurations
Learn which version you want to make
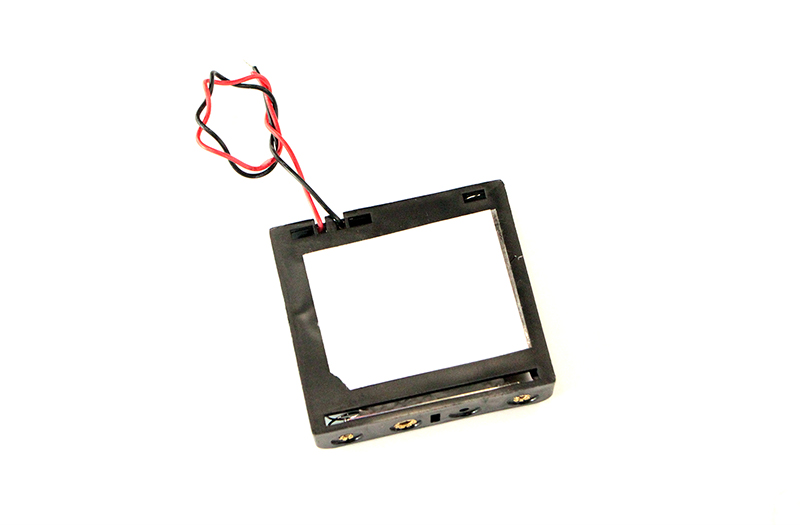
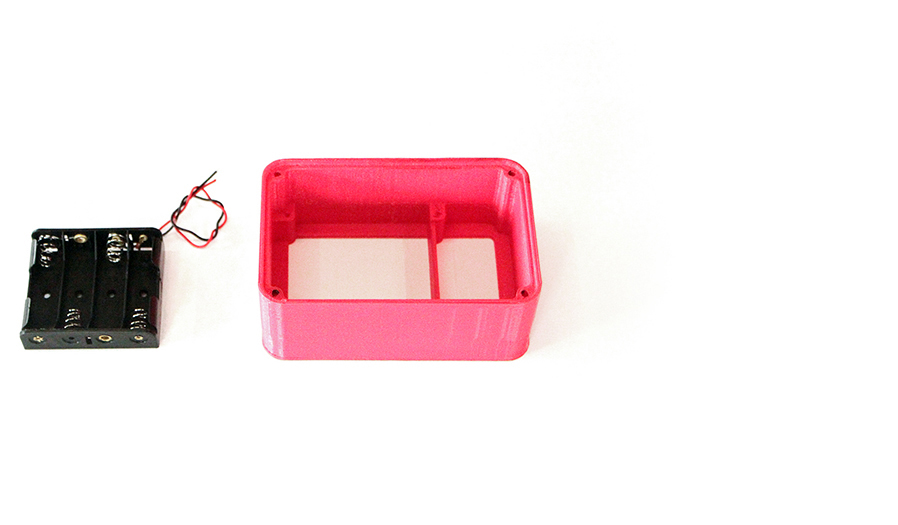
Put a little bit of double side tape/velcro o hot glue behind the battery case or lipo
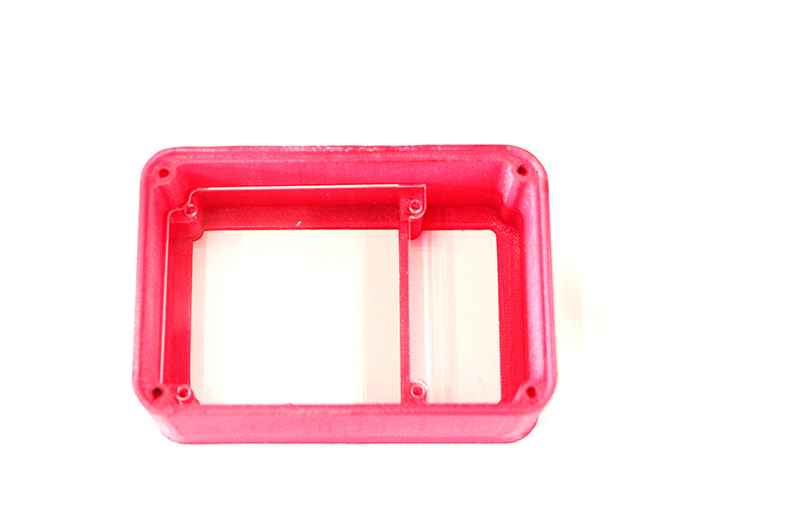
Introduce the middle panel in the frame and fits it in place
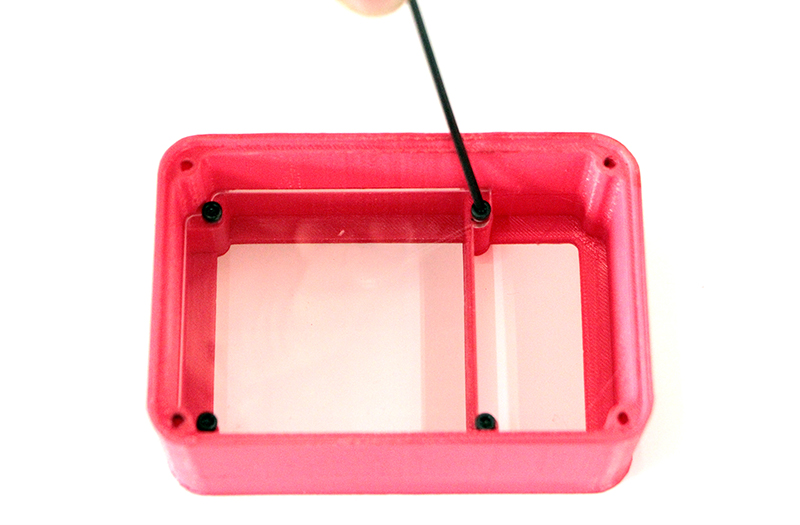
Use four screws 3 mm without washer to fix the panel.
Unstick the double side tape and check that it fits inside from the back.

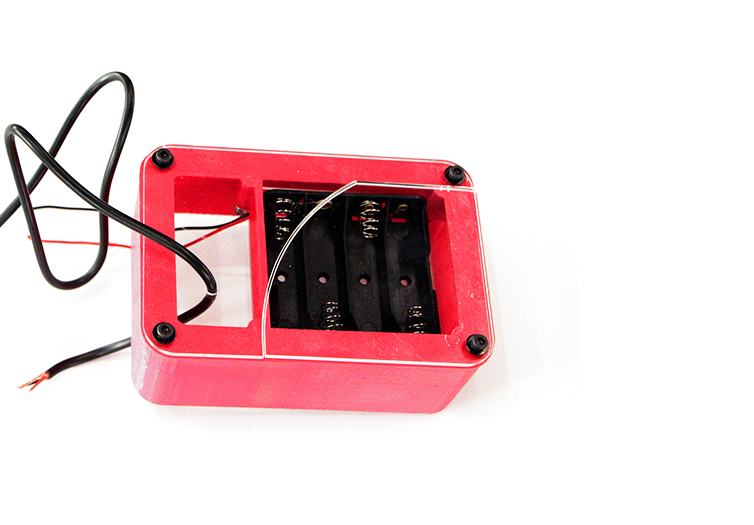
Introduce the wires from the battery on the side holes between the inner plate and the frame
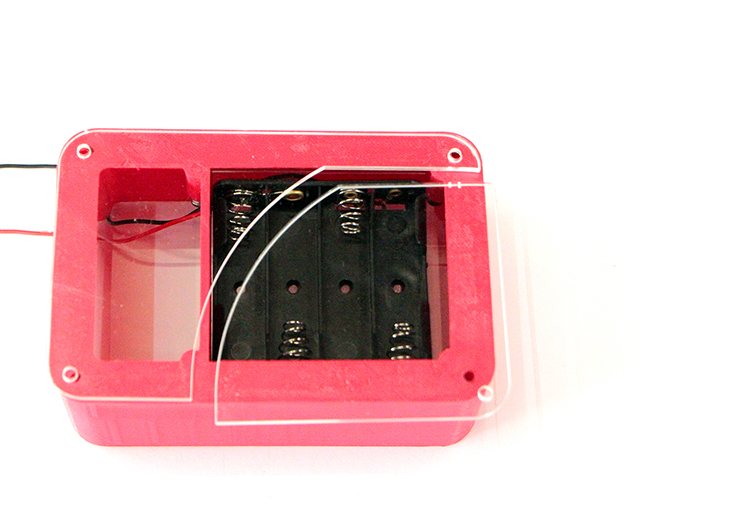
Fit the battery and test the position of the back panels to allow you replacing the battery.
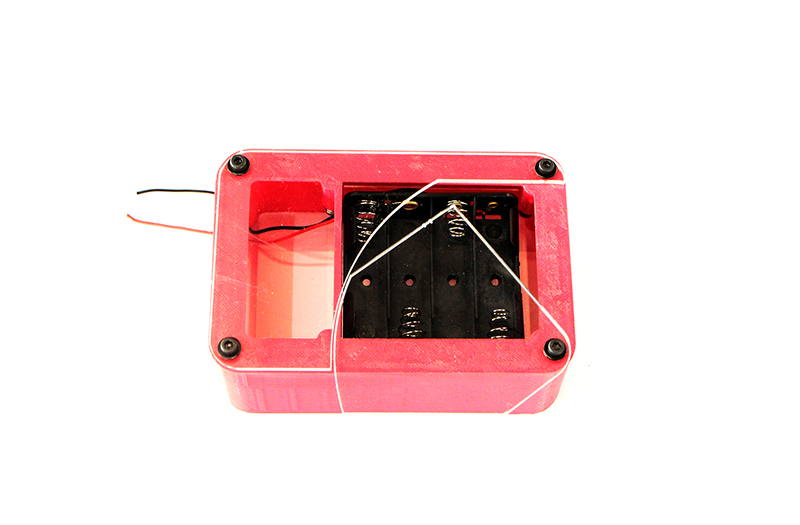
Use four screws of 3 mm and washers to fix the back panels.
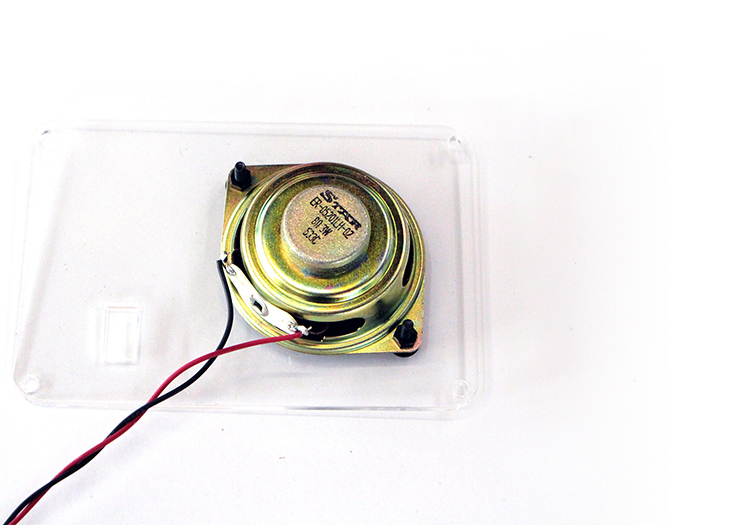
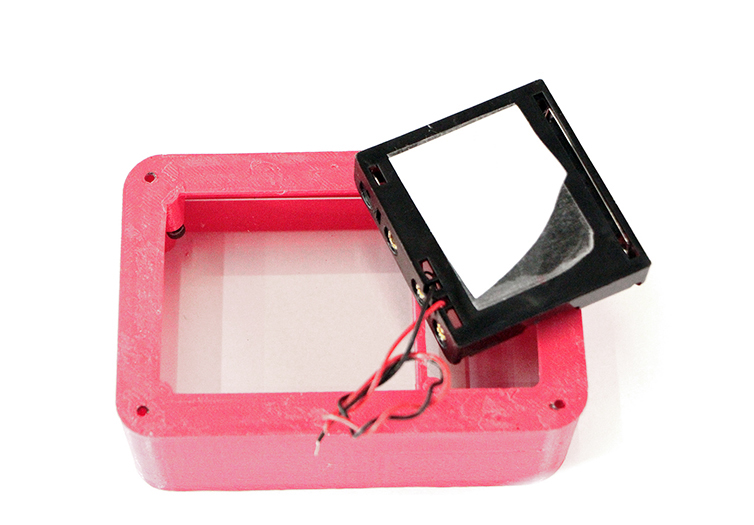
Fix the speaker with two screws,washer and nuts with the fixing ring or just glue the speaker on the profile.
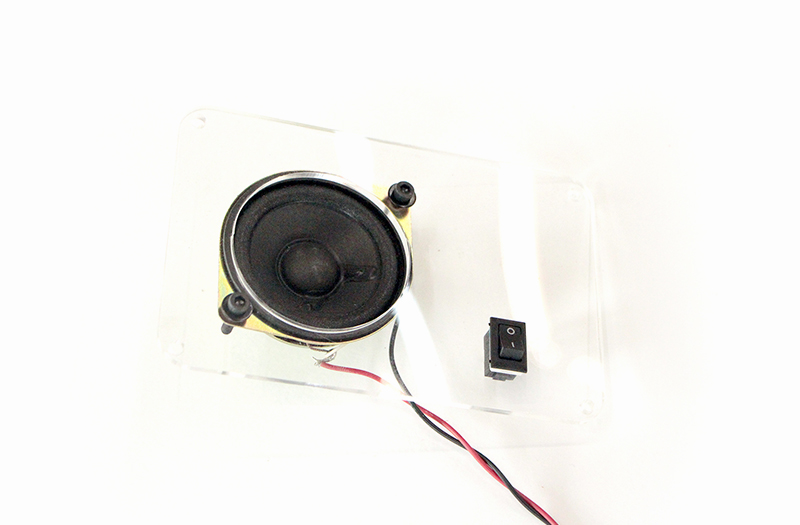
After turn face up the front panel introduce the switch by pressure,it should fit smoothly.
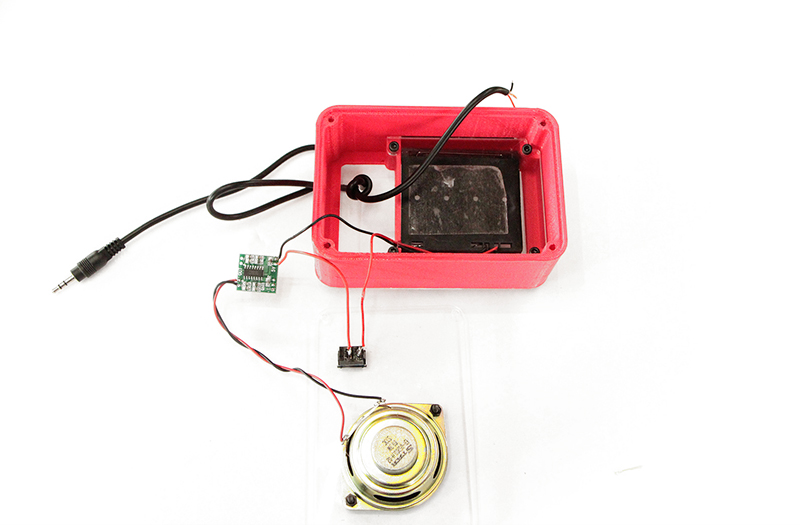
Introduce the stereo jack wire from the outside back panel to the inside,leave a maximun of 30cm outside.
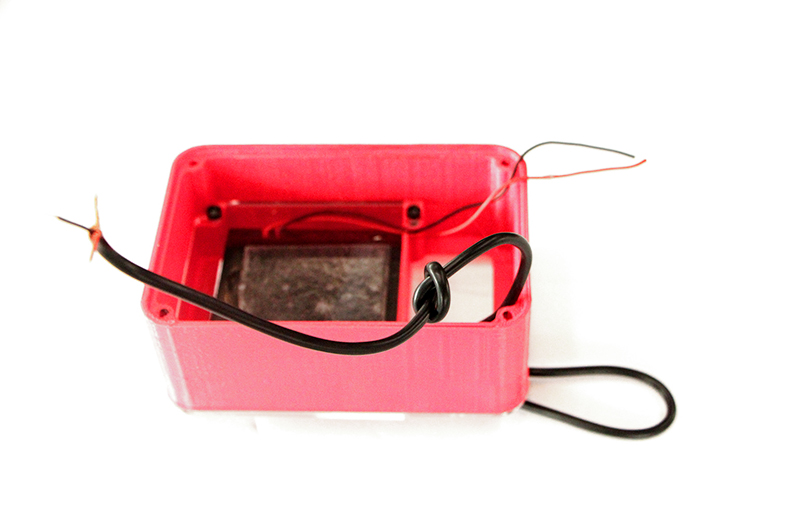
Make a knot on the wire to unallow it to stress the electronic.
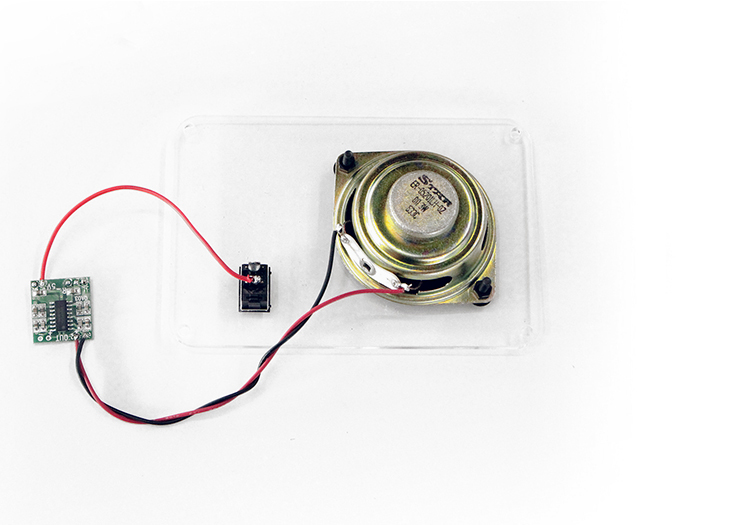
Solder the connections between the amplifier to switch and speaker.If you have the potentiometer version screw it trought the front panel.
Solder the connection from the battery to the switch and amplifier "be carefull to don't make shorts".
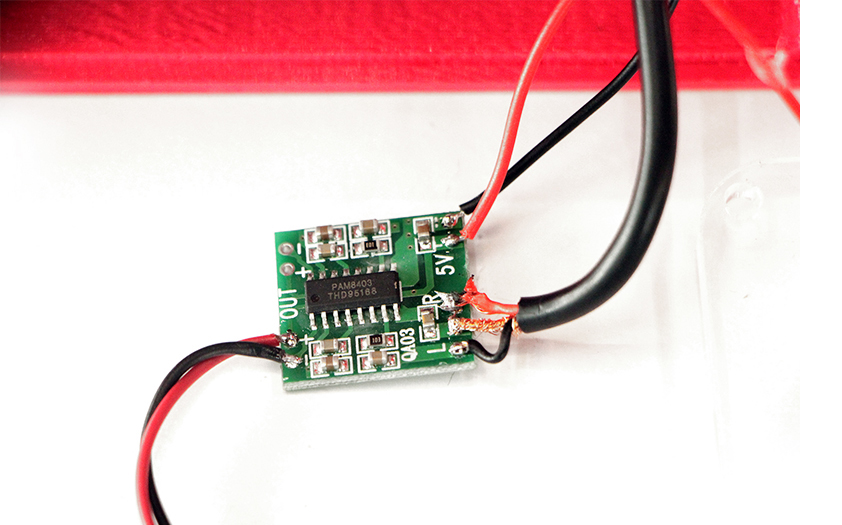
Solder the wires coming from the bluetooth or the stereo jack.Ground is in the middle position.Check all the solders looking for shorts.
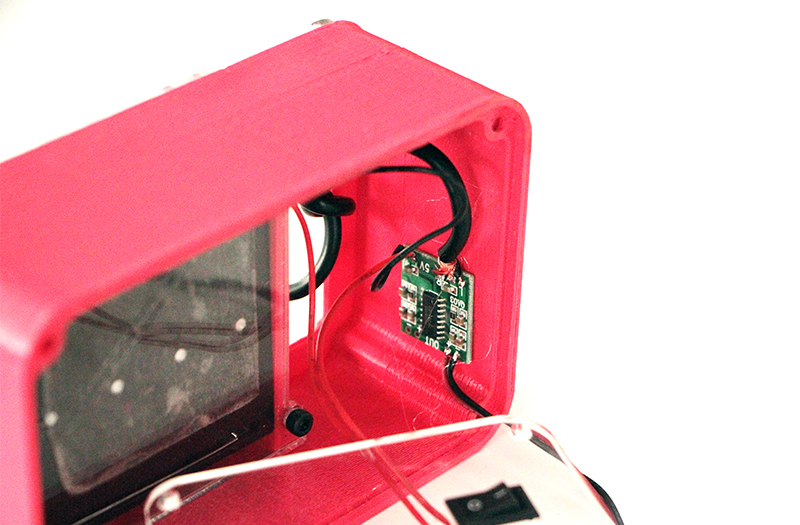
Fix the rest of the components to the frame of the speaker with hot glue
Close the front panel with four screws of 3 mm and washers.
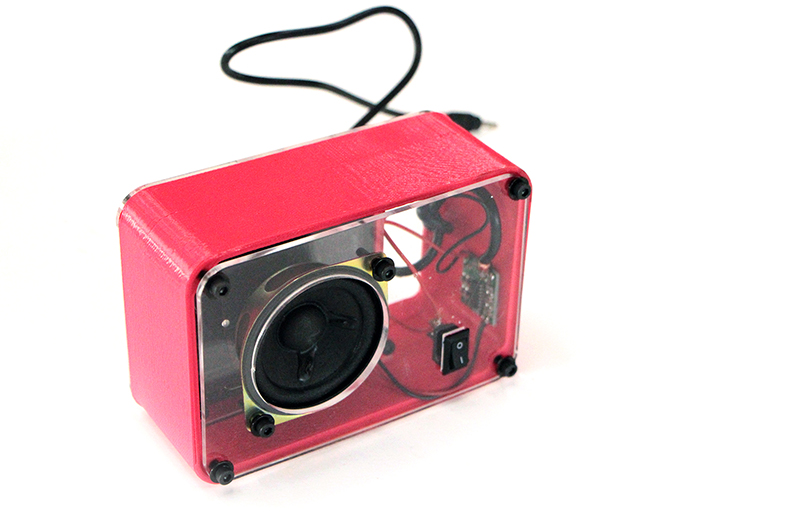
Put the batteries and... let's start dancing!.
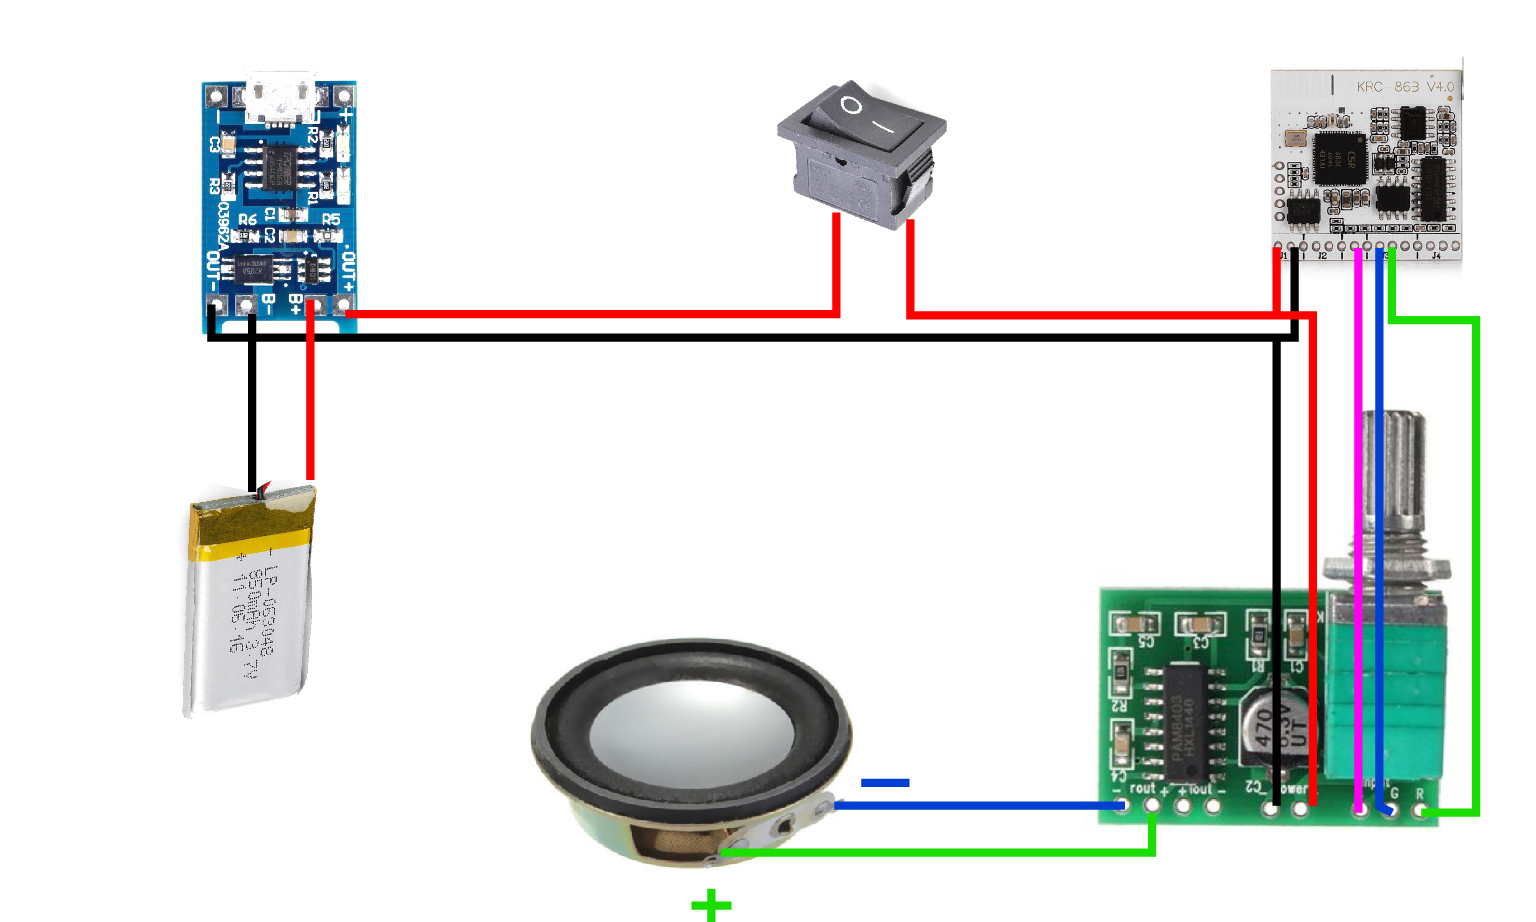
4 Inside choices for different tastes. Here are all the wiring connections.
The best sound in the cheapest and simpliest package ever.
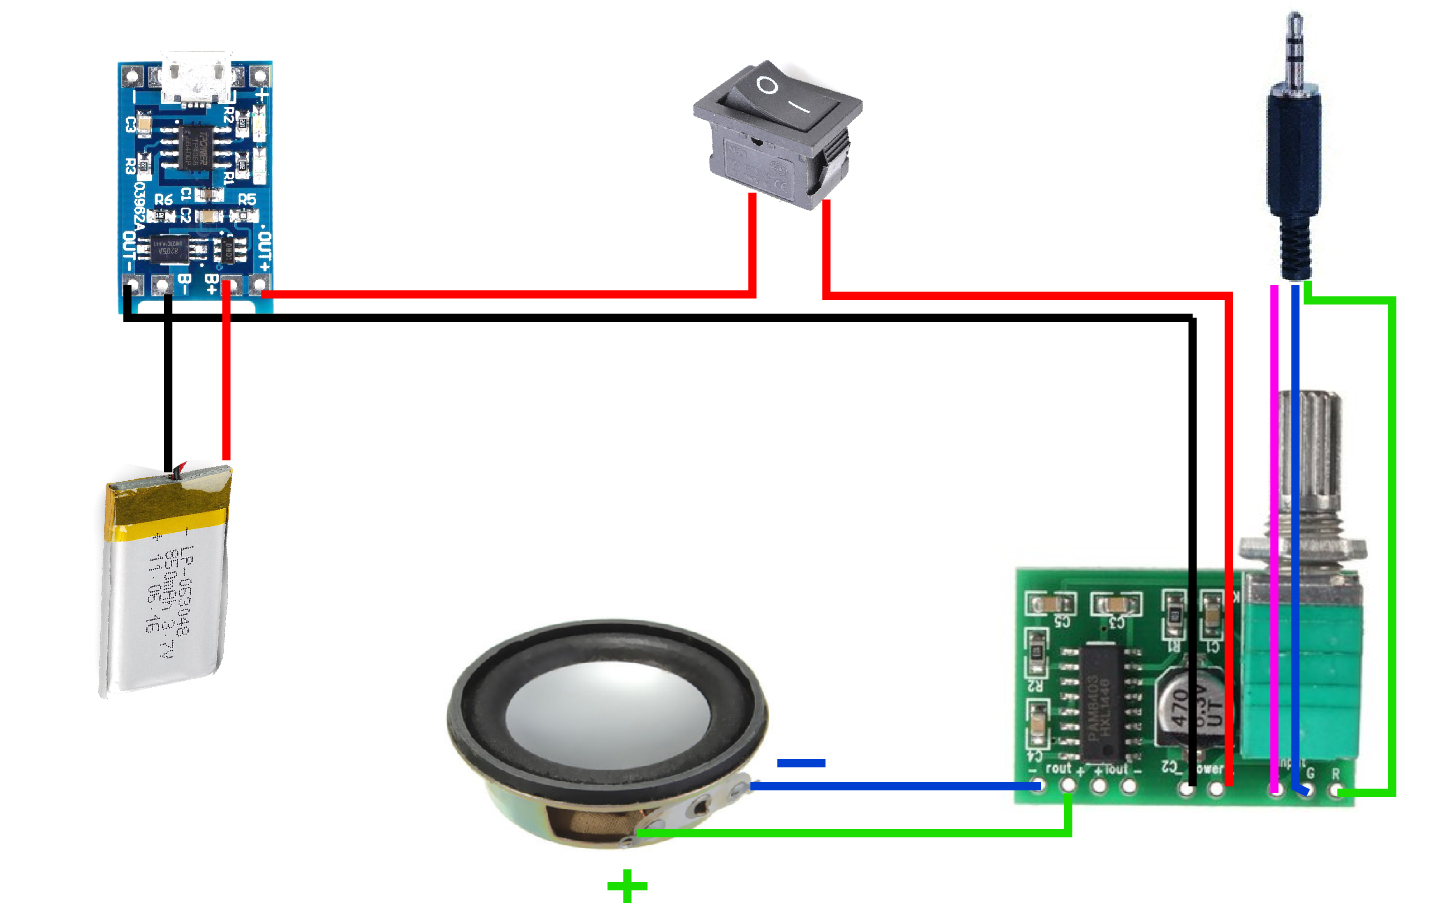
Longer battery life with low weight. Totally rechargable with a standart micro usb
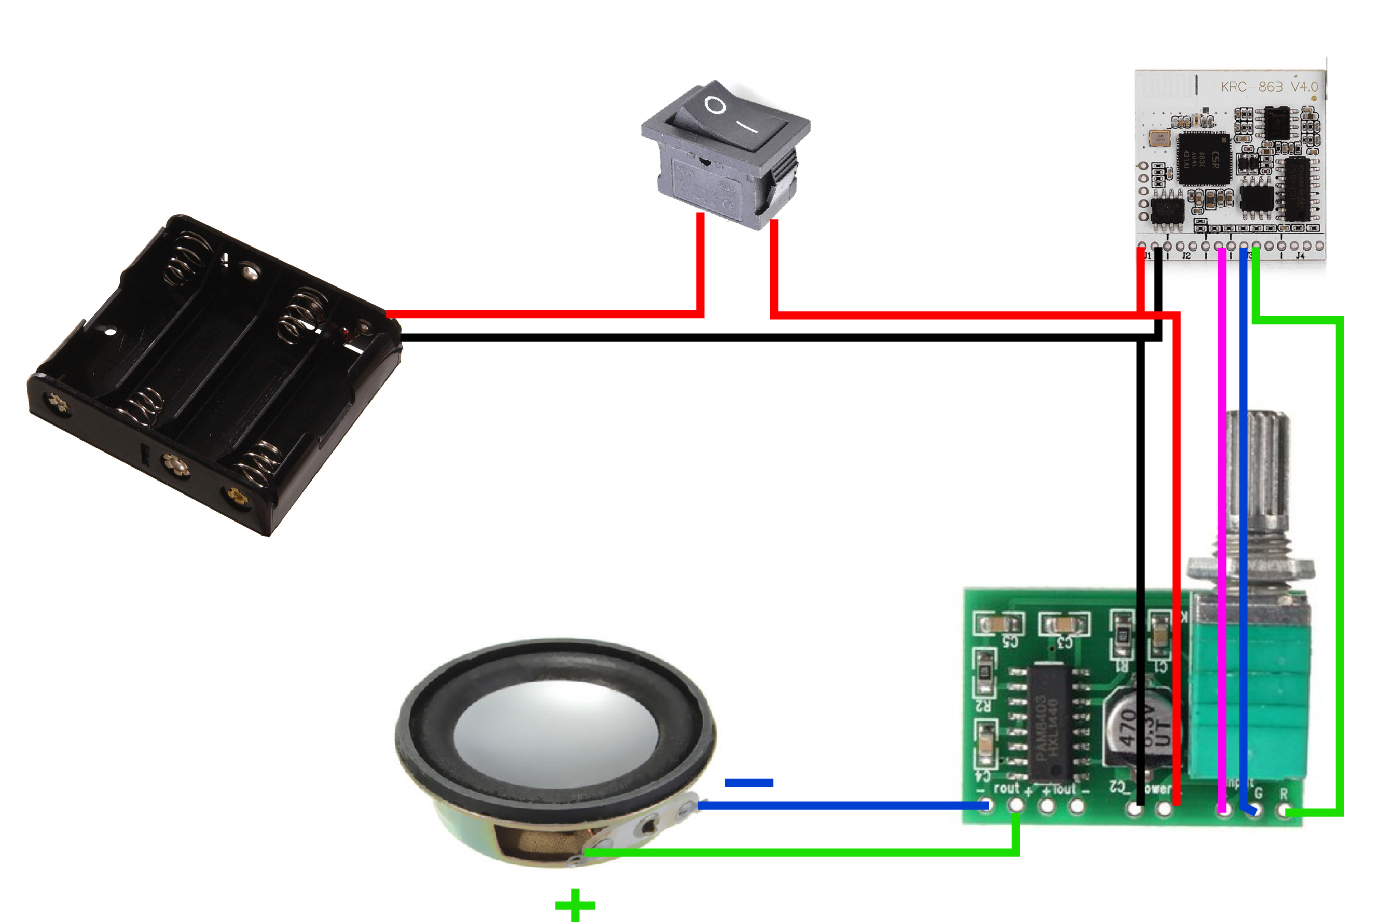
Want to use normal batteries and no wires? This is your choice.
The most high tech - low cost speaker. Light and powerfull.
| Type | Name | Description | Price |
|---|---|---|---|
| Basic | Speaker | 40mm 4Ω 3W Full-range Audio Speaker | 1.65 |
| Basic | Booster | PAM8403 Audio Amplifier 3Wx2 | 1.76 |
| Basic | Knob | Rotary Taper Potentiometer | 1.35 |
| Basic | Switch | Snap-in On Off Rocker Switch | 0.88 |
| Alkaline | Battery | 4 x AA Battery Holder with leads | 2.17 |
| Wired | Jack | Stereo Jack to Jack Plug Line Audio | 1.35 |
| Wireless | Wireless | Bluetooth 4.0 Stereo Receiver Module | 8.83 |
| Lipo | Battery | 3000mAh 3.7V Rechargeable Lithium Battery | 4.69 |
| Lipo | Usb Charger | Lithium Battery Charger Module Board | 1.55 |
| Version-1 | Alkaline + Wire | 9.16 | |
| Version-2 | Lipo + Wire | 11.88 | |
| Version-3 | Alkaline + Wireless | 17.99 | |
| Version-4 | Lipo + Wireless | 20.71 |
Send us an email and we will try to help you.